Today, websites are no longer static/still forms of digital media. With the advancements of the web, you no longer have to contact your local web developer to make content changes on your website. Programmers around the world are continuously developing new Content Management Systems (cms), or using existing ones, to help their customers manage their website with complete ease.
At NetGain, we have strong faith in the most popular CMS used today. That CMS is called WordPress. WordPress is a free open source Content Management System that allows users to update their content with ease. In this blog I will give you a brief explanation of how to edit a blog post in your WordPress website.
Login to WordPress
In order to login to your WordPress website, type your domain name in the address bar in your browser followed by wp-admin. Eg.(http://www.domain.com/wp-admin).
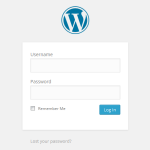
Once loaded, you will see a login form that looks like the image below.
To login to your WordPress website, type your username and password, in the appropriate field and click on Log In.
The Dashboard
Once logged in to WordPress’ Dashboard, on the left hand side you will see a panel of options to edit. Click on the posts option (image below).
The Posts
After clicking on the posts icon, you will be directed to a page that creates a tabled list of all the posts you’ve written (assuming this isn’t a fresh WordPress install). From this list you can edit, view and delete existing blog posts.
To add a WordPress blog post, click on the “Add New” button in the top left hand corner beside the “Posts” heading (image below).


